Blog

Blog entries about Acadia National Park, photography gear reviews, and other photography related information.

Leofoto LN-364C Review: The Value King?

The Leofoto LN-364C I used in this review

The Leofoto LN-364C I used in this review

“Buy nice or buy twice” is an oft-repeated truism in photography circles when it comes to tripods, and with good reason: a well-built tripod can last you decades, not to mention it can make (or break) many shots. But what constitutes a “nice” tripod, and how much does that cost? Leofoto was kind enough to send me one of their products, the LN-364C, to test out and review for you all. At $536 MSRP and after a few months using it, I’m pleased to report Leofoto may have just presented the best value proposition on the tripod market.

Disclaimer: I received this tripod from Leofoto for free, in exchange for a fair and unbiased review. I am receiving no compensation for this review. The included photos are of the review unit after 90+ days of harsh use and are unedited.

How I use my tripods

I put all my gear through a lot, and my tripods probably see the most abuse of anything: being drenched in saltwater/rain/snow/sand/dust, being dropped onto rocks, sitting through intense heat and freezing weather... As a landscape photographer, all of these are regular occurrences and ones where I need to trust my gear’s durability.

My old Gitzo G1257 lived through dust storms in Colorado, hours of salt water spray from tropical storms, and 15-foot drops off a cliff (oops). However, a few months ago I noticed it was on its last legs (pun not intended). Over time, the twist-locks stopped staying tight, and the hinges on each leg would loosen, requiring me to re-tighten them with an Allen key every few hours. It was time for my Gitzo to be laid to rest and to find a suitable replacement.

If you need any further proof of the conditions I subject my equipment too, you need not look further than this.

Why Leofoto?

My search for a new tripod had a few parameters:

  • No compromises on build quality

  • Rated for at least 20kg load

  • Minimum 1600mm max height

  • Weight not exceeding 3 kg

Generally when looking for top-quality tripods, you’ll see several names come up. Really Right Stuff, Gitzo, and ProMediaGear are at the very top, with brands like Manfrotto, Induro, and Vanguard following closely behind. Quality comes at a price, however. A tripod that fit my needs would be ~$1,000 from any of those top brands. Naturally, I balked at spending that much on a tripod. Surely there had to be something out there that met my requirements and wouldn’t cost more than my camera body did. After some research I ran across a relatively new brand: Leofoto. Reviews were sparse but the few I found were very positive, so I was excited to get to try it out for myself.


First Impressions

You can find all of the specs here, but suffice to say: this is a heavy-duty tripod. Rated for 35kg with a main leg diameter of 36mm made of 10-layer Carbon-fiber, this tripod will comfortably handle all but the most extreme of telephotos.

After getting some time to play with the tripod, my biggest takeaway was that this thing is built well. The angle stops move smoothly and adjust easily. The leg twist-locks are tensioned so that they lock the legs securely, and loosen within one turn. The machining is excellent and all exposed aluminum is anodized for protection. You get a sense that this tripod was built with care and there’s nothing that feels cheap about it. On the contrary, it feels premium. Material quality is exceptional all around and I’ve gotten more than a few comments from some fellow photographers who assumed it was much more expensive than it actually was.

I also appreciated the little details that Leofoto included, like the the bundled video bowl, replaceable spike feet, and all necessary Allen keys for adjustments.

In the Field

I’ve now used the LN-364C for about 90 days, during which it’s been my primary tripod and seen extensive use. It’s seen hours of hard rain, several coastal storms with more salt water exposure than I’d generally feel comfortable with, and more than a few hard drops due to my carelessness. So how is it doing? Everything works like just as perfectly as the day I got it. Twist locks secure tightly while loosening with a single hand; angle stop is still easily adjustable; and leg joints move fluidly and stay at the angle you move them to. There are a few cosmetic “dings” from wear, but none of them have gotten past the anodized layer. I’m very impressed with the durability and its fared better than my Gitzo did with similar use.

The twist-locks have excellent grip and make adjustment very easy.

The twist-locks have excellent grip and make adjustment very easy.

Where it would often take me 2+ minutes to setup my Gitzo, fiddling with twist locks that wouldn’t stay locked and angle stops that were tough to move, I can get my Leofoto set up in under 20 seconds. While this might not seem like a big deal, 1 minute can be the difference between catching the perfect shot and missing it. There’s nothing more frustrating and disappointing than missing that perfect clearing in the clouds because you couldn’t get your tripod setup in time. I don’t see that happening with the Leofoto.

Beyond the ease of use, the LN-364c has exceptional vibration dampening. Even loaded with a Nikon D800 + 80-200 f/2.8 AF-S, a self timer of 3 seconds was enough to dampen all vibrations from pressing the shutter when I had forgotten my remote shutter release.

The included rubber feet, you can tell how thick the rubber is on these!

The included rubber feet, you can tell how thick the rubber is on these!

The replaceable foot design is incredibly useful. I’ve yet to use the spike feet, but with winter fast approaching, I’m sure they will see use in icy conditions. The rubber feet are very high-quality and stick to even slippery rock very well, a must for a coastal photographer. Once tightened, they form a tight seal on the tripod legs and don’t allow water in, even when submerged. I could never get my Gitzo legs to do the same and I had to drain the legs of water after shooting in rivers.

On that note however, lets discuss maintenance. I rarely take apart my tripods due to lack of time but those of you who do, will be happy to be informed that Leofoto’s tripods are easy to disassemble and clean, something they highlight on their website, and in this review by photographer Jon Chiang

The built-in level is a welcome feature and the platform release is an excellent feature for those looking to use the included video bowl

The built-in level is a welcome feature and the platform release is an excellent feature for those looking to use the included video bowl

Areas for Improvement

As great as this tripod is, there are a few drawbacks to this model.

  1. It’s heavy. Leofoto’s website quotes the LN-364c as 2.6kg and it feels every bit of that. I value durability over weight savings, but I definitely feel this tripod more than I’d like on long hikes. Comparable offerings from Really Right Stuff and ProMediaGear are lighter.

  2. I had to slightly loosen the screws on the top of the leg joints so they were easier to adjust.

The Bottom Line

Any criticisms I have of this tripod are tempered by its insanely low price. You can pick up this model for just $536 via Amazon. It’s difficult to find too much to complain about when the direct competitors are selling for nearly double that. At the beginning of my time with this tripod, I was skeptical. After all, it’s a relatively new brand without a proven track record. No one in my local circle had heard of the brand. But after spending about 3 months putting the LN-364C through its paces, I have no hesitation in recommending this tripod, or any LN series tripods from Leofoto, without reservation.

This tripods build quality and durability stands with the best in the industry, this is a tripod I imagine I will use for quite some time.

Scouting Locations for Photography: How to get the most out of your trip

One of the biggest challenges that comes with landscape photography is being able to determine what locations to visit in a new area, or even new locations in an area where you're a regular. The goal of this post will be to share the strategies and methods I've learned to scout locations for photography and make the most out of your trip.

Boulder Beach, one of the first page results on Google if you search for "Acadia National Park photography." Photo by Aybars Gungor.

Boulder Beach, one of the first page results on Google if you search for "Acadia National Park photography." Photo by Aybars Gungor.

Step 1: Do some research

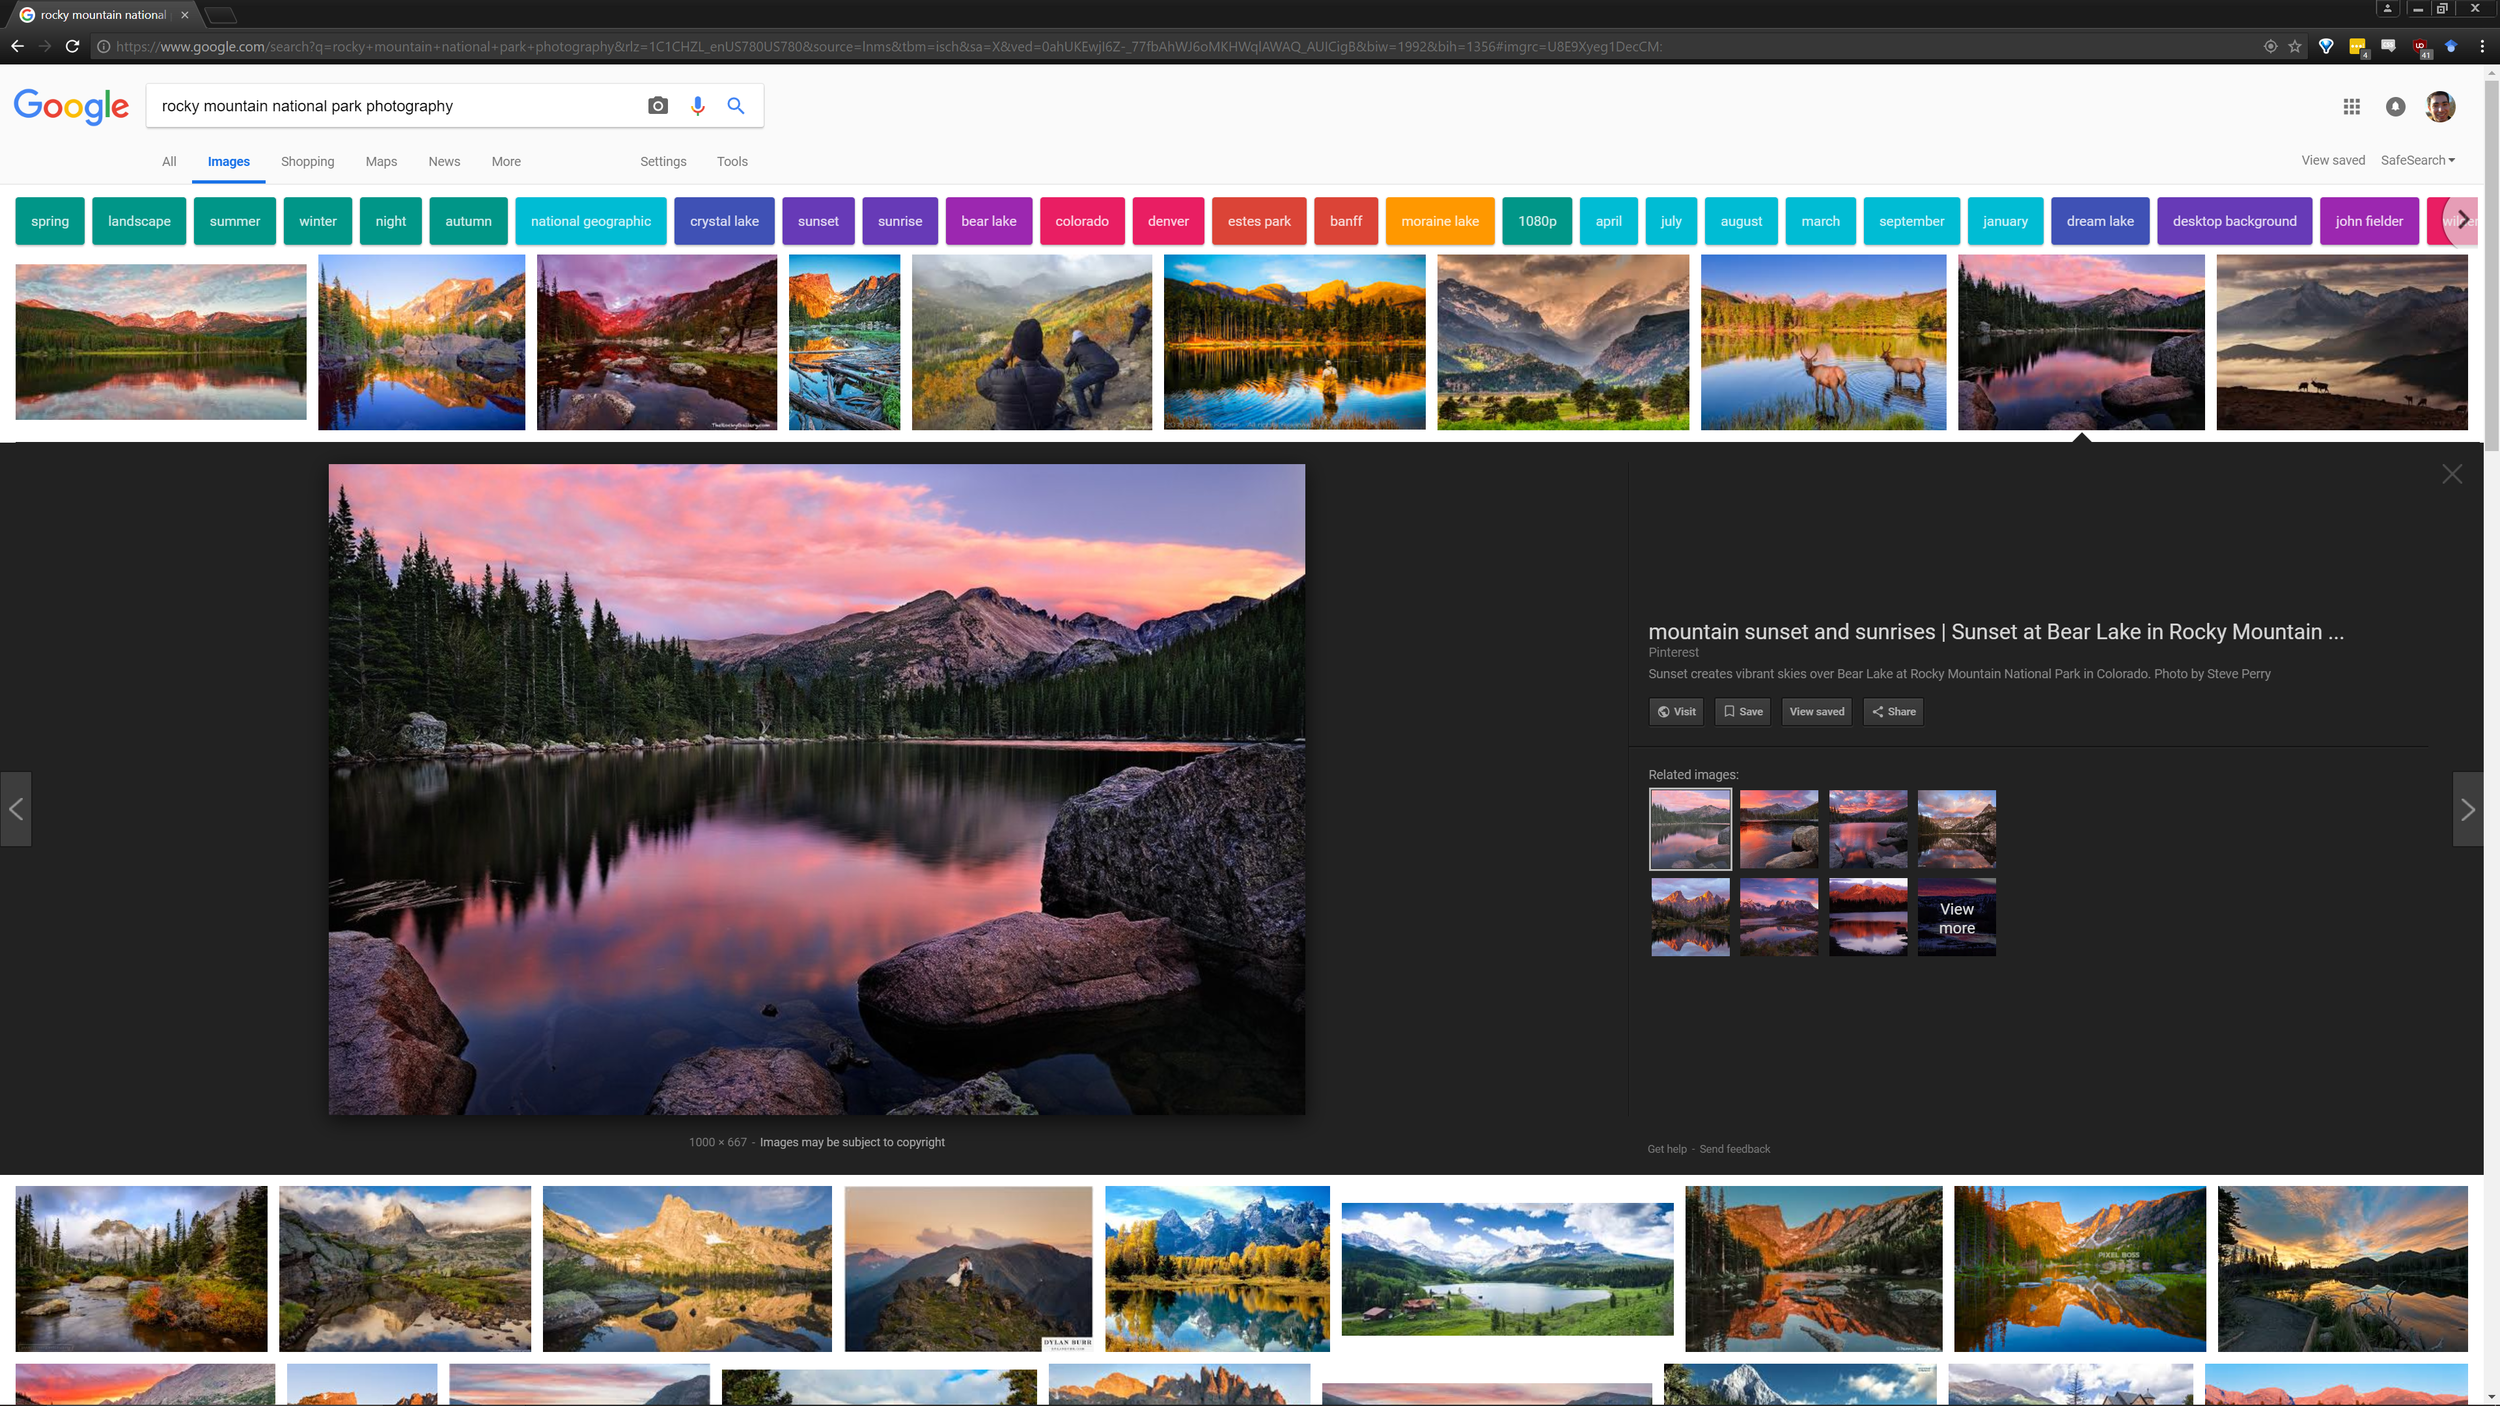
Whenever I'm trying to scout a new area, especially one I'm unfamiliar with, my first step will just be some basic Google searches. Let's say you want to plan a trip to Rocky Mountain National Park for landscape photography. Your first step could be as simple as Googling "Rocky Mountain National Park Photography". Check out the first page of results in both pages and images. You'll need to filter the images that are tagged incorrectly or irrelevant (searching for Rocky Mountain National Park gets a few images of Lake Moraine in Canada because "Rockies" and "National Park" are keywords we used). From here you can start doing different variations of your search. For instance:

  • Rocky Mountain National Park winter photography (you can insert whatever season you'll be visiting)
  • Rocky Mountain National Park photography
  • Rocky Mountain National Park Colorado photography
  • Rocky Mountain National Park landscape photography
  • RMNP Colorado photography spots
  • Rocky Mountain National Park sunrise/sunset photography

Try as many different variations as you care to do. Between poorly tagged images and websites and Google's search algorithm, you'll get often get different results with nearly identical searches — so don't hesitate to try many different combinations.

At this point you should have a basic list of spots and a better understanding of what the area offers. You could stop here, but you'd likely miss some of the more off-the-grid spots and info you'll get in the next steps.

If you're lucky you'll have a location tag right in the image, if not, you'll have to spend a little time cross-referencing other results to get a specific location.

If you're lucky you'll have a location tag right in the image, if not, you'll have to spend a little time cross-referencing other results to get a specific location.

Step 2: Narrow your search

So, you've got a few places in mind; now what? What I recommend is taking a few of those spots you decided on, and plugging them into 500px and Flickr. The search feature on 500px is especially powerful. You can see work that hundreds of photographers have done at that same location, and get a better grasp of what you can expect for the time of year and conditions you anticipate shooting in. Take the time to look through the captions, comments, and replies, as oftentimes you'll find useful information that you'd miss otherwise. Look at those photographers' portfolios and you can often find other shots they took in the same area that you may have missed in your original search.

  • Instagram hashtags can also be a useful tool, though lacking in filtering capabilities which puts it a tier below 500px and Flickr for searches. 
  • I've also started using Reddit for searching purposes. R/earthporn is a good starting point. You can also find decent threads using the website-wide search feature, although this takes a bit more sifting through. Don't forget to look through the comments and author's post history, as well.
Always check the comments! The original poster will frequently give specific locations and advice based on conditions.

Always check the comments! The original poster will frequently give specific locations and advice based on conditions.

Step 3: Network!

This could be the most important step in scouting locations for photography thus far. By now you've likely identified a few photographers who have good work in the area — time to reach out and shoot them a message. Oftentimes your best resource will be locals in the area who can give you much more specific and relevant advice than what you find on the internet. I'll typically use Instagram DM's if they're active on the platform, but using their website form-fill or email address is also a good bet. Now's your opportunity to ask any questions you still have that are unanswered. You could also include a quick overview of what you plan on doing and ask if they have any advice. Always include a (genuine) compliment toward their work and an offer to meet up if feasible. People are more likely to reply and give you good info if you're willing to offer them something in return, even if that something is just appreciation for their work.

Don't get discouraged if you don't get responses from everyone. Some people are busy; some people would rather not give away their spots; and some just don't check their messages (guilty!). 

Step 4: Break out the maps

After you've learned all you can using Google and other photographers, it's time to do some nitty-gritty research of your own. Get on Google Maps satellite view or Suncalc (my personal preference) and look at the local geography along trails or roads you'll be on. What's great about Suncalc is that you're able to easily see where the sun is in relation to where you'll be shooting through all hours of daylight. If you're shooting a mountain, knowing when and how the light will be hitting a peak is absolutely invaluable. Suncalc will help you figure this kind of stuff out.

Other things you might want to pay attention to while looking at a map of where you're visiting:

  • Bodies of water (Streams, Rivers, Lakes etc)
  • Overlooks or places with big elevation changes 
  • Changes in type/density of vegetation 
  • Anything you think might be cool

This can be a great way to do some off-the-grid scouting of locations for photography. Some of these spots might turn out to be total flukes, but often you can pre-scout some really awesome and otherwise unknown spots this way.

I'll also start making notes of what locations require what conditions. If a certain composition really needs light from sunrise hitting the mountains to work well, I'd make a note of that so I don't attempt to shoot that location on an overcast morning. Especially when you have limited time on a trip, taking the time to optimize your odds and understand what conditions you need is really valuable.

Knowing the timing and direction of light is really helpful in deciding where to shoot for sunrise or sunset.

Knowing the timing and direction of light is really helpful in deciding where to shoot for sunrise or sunset.

Step 5: Be flexible!

A mistake I've made, and seen many others make, is over-researching. When you spend a significant amount of time looking up locations and what other photographers have done in the area, you can easily get into a position where you stifle your own creativity and simply go after shots others have already done. While there is nothing inherently wrong with shooting compositions similar to what other people have already done, it can often be more rewarding to go off the beaten path and try to pursue something that hasn't been done often — or at all. When I'm planning a photography trip I'll always try to make a list of some "safe" compositions and locations alongside some "risky" compositions and locations. This way I'll go for some of the low-hanging fruit (for instance, Dream Lake at sunrise in Rocky Mountain National Park) as well as trying some spots that I haven't seen done before. 

A final word

There are many, many methods of scouting an area for photography, and many more I haven't even discussed (like books, tours from locals...). That said, this is the process that I've found the most success with, and I highly recommend using at least one of these when you're scouting a new location for photography. Give it a shot next time you're planning a trip and let me know if it was helpful!

On Photographing the Milky Way

There are many guides on how to take pictures of the Milky Way from a technical standpoint, but fewer on how to set up for the perfect shot in advance. If you're looking for a good jumping-off point of the basic techniques of astrophotography, I can give a strong recommendation for Lonely Speck's guide on the topic.

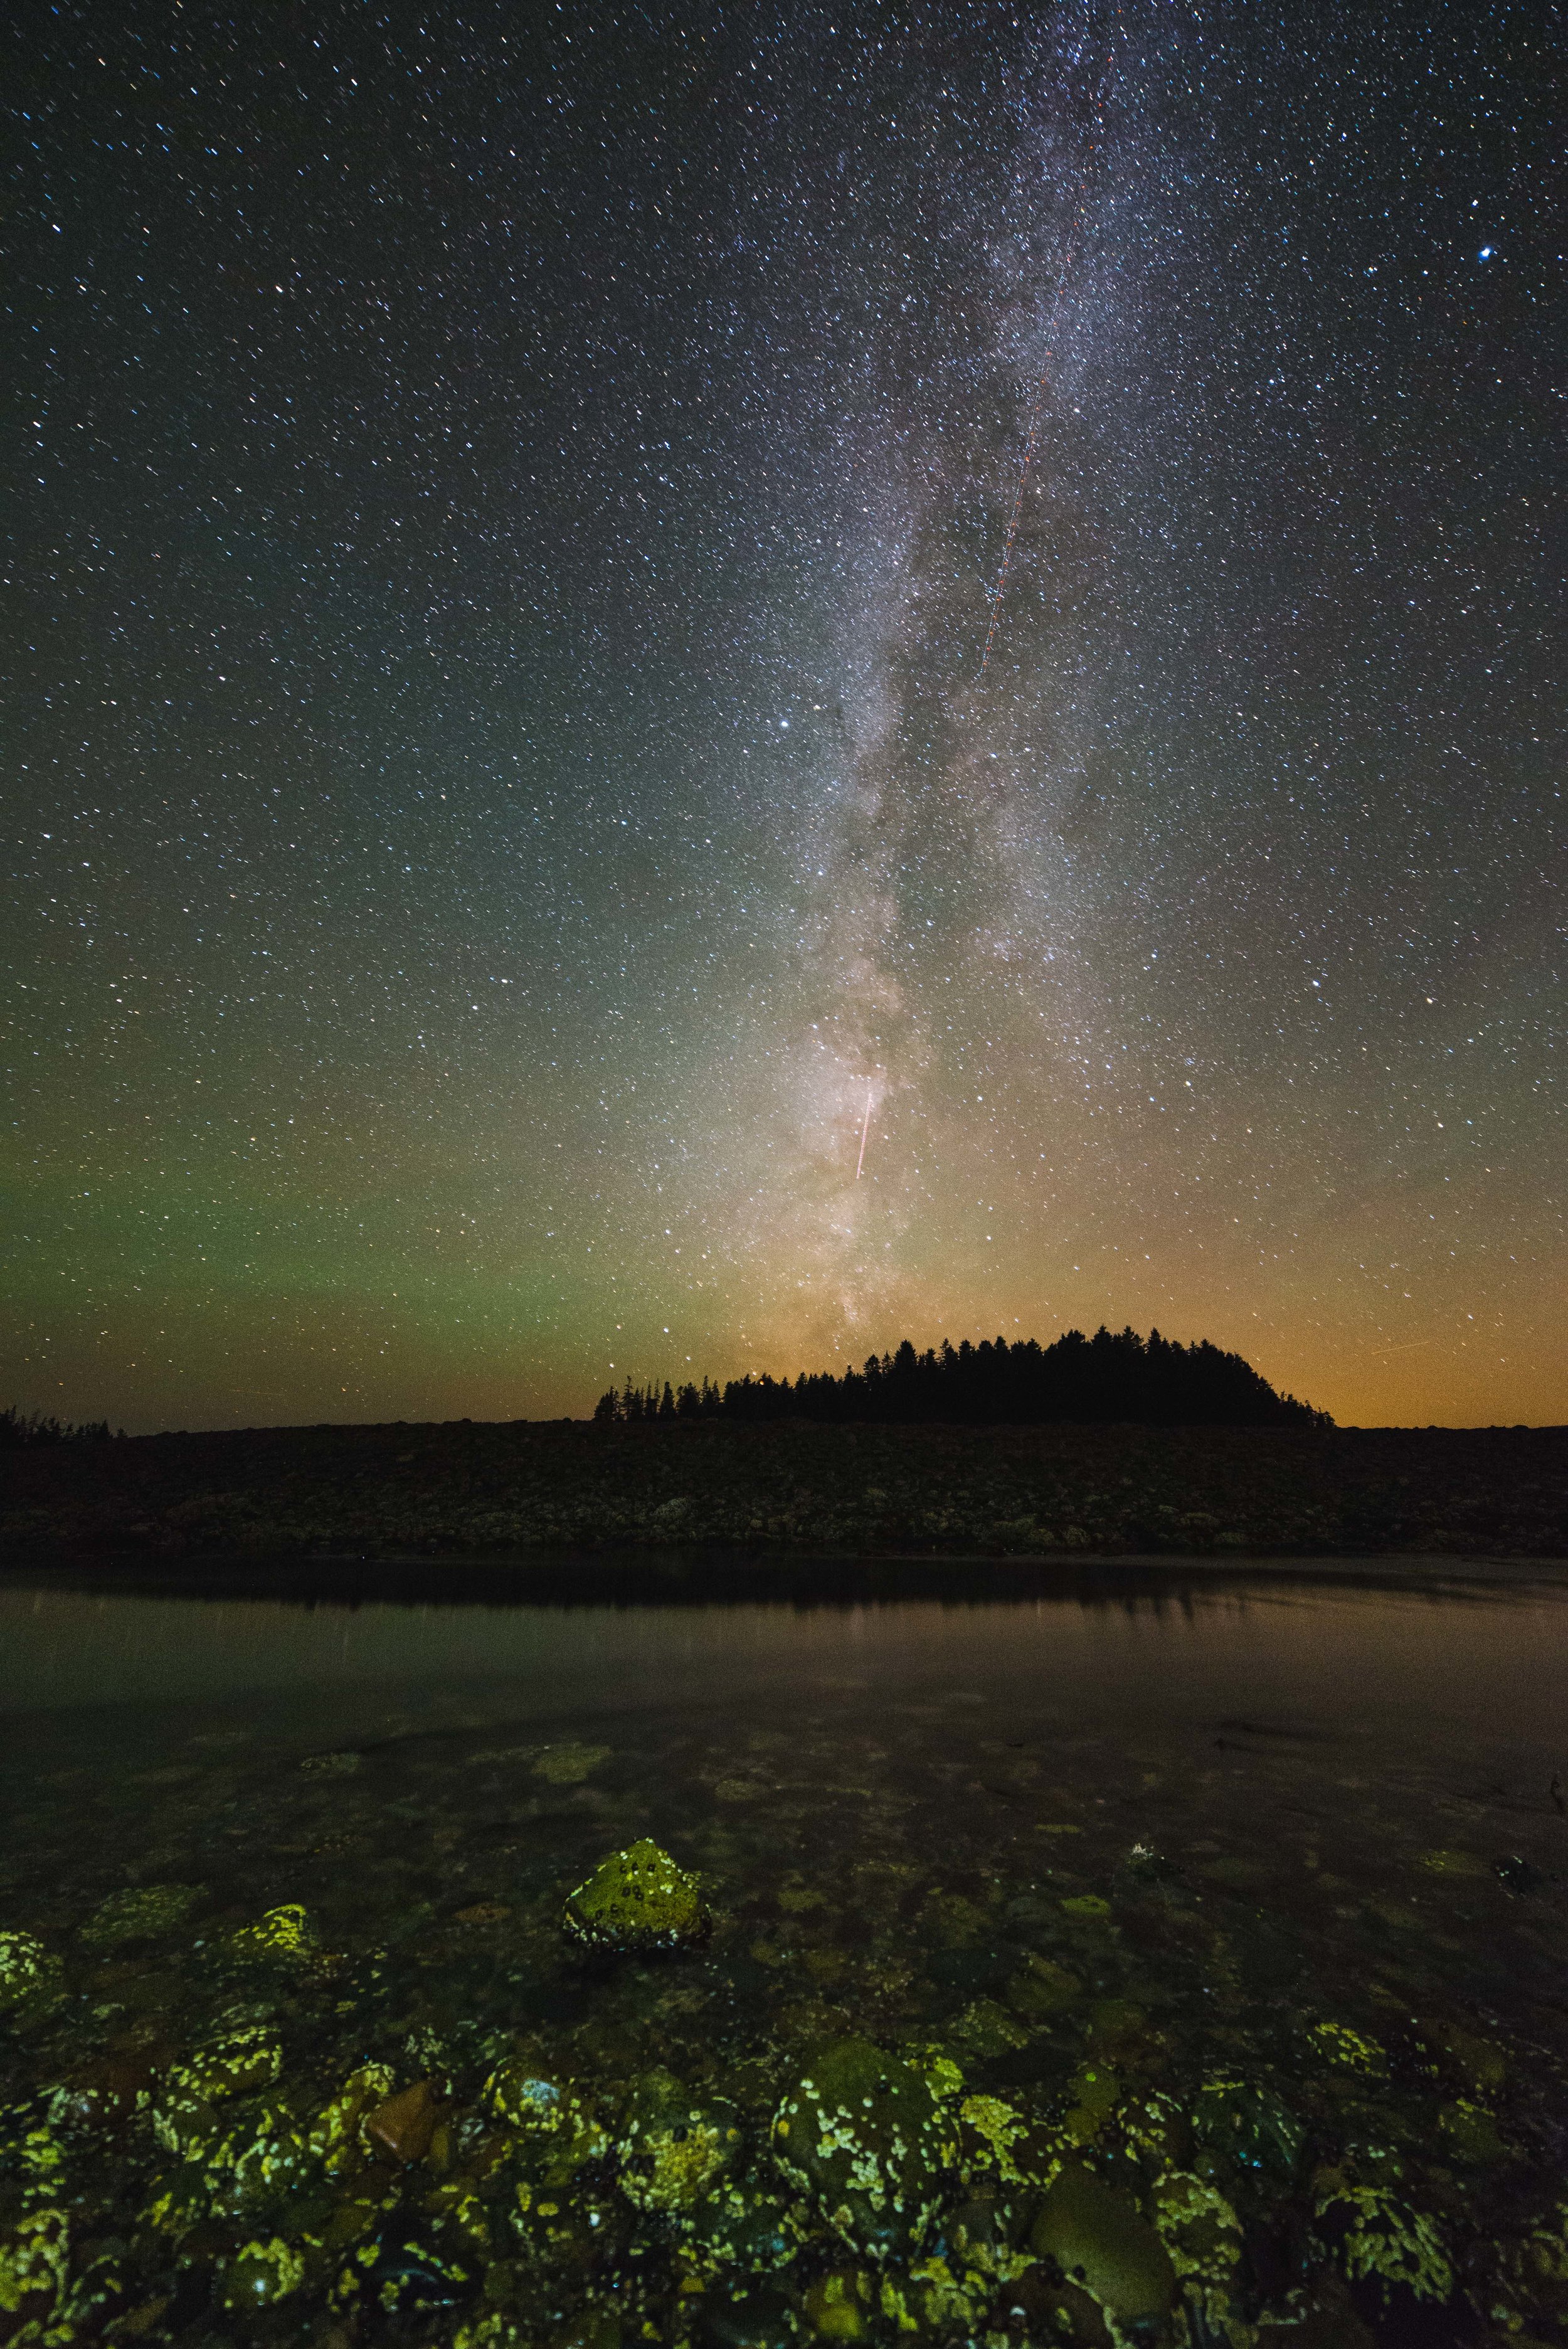
14mm f/2.8, 38 seconds, 5000 ISO, foreground manually illuminated

14mm f/2.8, 38 seconds, 5000 ISO, foreground manually illuminated

There are several considerations you have to make in preparation for a Milky Way shoot. You won't always be able to shoot under optimal conditions, but a bare minimum needs to be met in order to get decent photos. Here are the variables:

  • Moon phase (additionally, moonrise and moonset)
  • Season 
  • Light Pollution
  • Time of night (the Milky Way changes position throughout the night)
  • Weather (clouds, humidity, 'transparency')

So let's break these down:

The Moon

One of the first considerations you need to make when trying to shoot the Milky Way is the moon. As we all know, the moon goes through phases. What this means in a practical sense, is that the level of illumination the moon gives in the night sky changes through the lunar cycle. Trying to shoot the Milky Way during a full moon is effectively impossible - anyone who's tried will tell you the moon lights up the sky like a second sun. You can use this website to see the percentage of the illumination. Anything under ~20% illumination is usable, anything over 50% makes it very difficult to get well exposed pictures. 

The second factor to take into account with the moon is the moonset and moonrise times. If you're lucky, you can avoid the problem of moon illumination by taking your shots after moonset. You can use this website to find what time the moon is rising and setting, and where. 

Overall, the week before and after a new moon is the best time for astrophotography. The day of the new moon is probably the best day to go shooting as the moon will not provide any illumination on that day.

14mm f/2.8, 30 seconds, ISO 5000

Light Pollution

Light pollution is another concern. The simplest way to check this is to simply check out a map that includes light pollution data, like this. My experience is that you can get a decent viewing of the Milky Way up until the dark green; past that and you will have difficulty making out any detail. As a general rule of thumb, if you're at least an hour outside any urban or metropolitan area, you should have a decent chance of getting some detail in the Milky Way. 

One factor that's less often taken into account is airglow. This is essentially radiation in the upper atmosphere that can sometimes be seen over the course of long exposures. Another form of airglow can be seen when shooting towards areas of light pollution. So if you are shooting south, and there is a major city to your south, you may see some illumination on the horizon as a result. Make sure to take this into account when planning a trip or a specific composition. 

Weather

An obvious factor is the weather. As you could guess, cloudy skies are not going to make for clear Milky Shots most of the time. The best website I've found for monitoring the weather is ClearDarkSky, which projects a forecast specifically designed for astronomy purposes. This can give you an hour-by-hour breakdown of expected conditions. I've used this website pretty extensively and had great success with its forecasts. Often you may be unable to find the exact area you plan to be shooting at, but anywhere within 20 miles will probably be sufficient.

Humidity is an often overlooked factor which can affect the transparency of the sky. In highly humid weather your shots may come out "hazy." While this can be recovered in post-processing (to an extent), it's best to plan ahead and avoid weather like this. Humidity can also cause condensation on the front lens element, ruining exposures.

The Milky Way "Season"

From the northern hemisphere, the best time of year to photograph the Milky Way stretches from March to October, with the summer months being the most ideal. Because of the Earth's rotation, by the end of October you may only have an hour-long window or less before the galactic center fades under the horizon. During the winter months, the galactic center may never even be visible as it stays under the horizon. The galactic center is the brightest, most contrast-y part of the Milky Way, making it the most popular focus. You can still get photos of other parts of the Milky Way throughout the winter, but they probably won't have the same punch as your pictures would in the summer. 

Time of Night

Assuming good conditions, a final planning consideration should be what time you plan on shooting. This determines where the Milky Way will be in the sky and how much of the galactic center will be visible. If all the interesting foreground elements are in the south and you want to include the Milky Way in your shot, then it would be prudent to consider when the Milky Way will cross the sky at that point.

How do you do this? Fortunately you don't need much, if any, knowledge of astronomy. 

By using a night sky program like Stellarium (which I personally recommend) you can input the rough coordinates of where you plan on shooting and it will output a visual simulation of what the sky will look like through that night (and day). This way, you can figure out where the Milky Way will be when you intend to shoot it. This is invaluable when it comes to planning a composition ahead of time. 

Don't worry, you won't have any trouble finding the Milky Way when you get out there in person - on a clear day with no light pollution you can see the bands of the Milky Way clearly in the night sky.

14mm f/2.8, 35 seconds, 6400 ISO

Conclusion

As with all things, experience is what will teach you the most, but some proper planning can save you a lot of disappointment (take it from me, driving 4 hours only to realize the moon is too bright is no fun!) Every time I go out to take Milky Way pictures I make sure to check the moon phase, weather, light pollution (if the area is new), and do a quick run with Stellarium. If all signs point to go then I'm on my way!

The Milky Way can be one of the most beautiful, incredible things you can capture with your camera, and not as difficult as many people think it is. Hopefully you picked up some tips from reading this.

Happy shooting :)